Bread-ucation!!
Bread is one of those things - you're not guaranteed a result even if you are given the recipe. It takes technique, with the right recipe and the right conditions, to achieve the fluffy interior and crusty exterior that is the holy grail of white bread.
I've dabbled with bread on and off over the years, but I knew that I would absolutely get back to figuring this culinary puzzle out if it was the last thing I did!!
The biggest thing that I had to get over was the thought that baking bread, unlike some other baked goods, is not a game of precision, but a game of ratios. Even as you gather your ingredients, there are variables - flour that is the correct type and the correct brand might not be the same flour all over the world or even all year round!
So my experiments started with my food processor and the absolute basic ingredients of bread - flour, yeast, honey (or sugar, to feed the yeast) and water. I knew that 500g of strong flour (if you'd like to read more about why strong flour, click here!) needed about 2 flat teaspoons of instant dried yeast, so for my 2 cups of flour - about 340g isn - I sprinkled over 1.5 teaspoons of instant dried yeast. 1 tablespoon of honey went in to feed the yeast, and enough water to make a slightly tacky dough - about 200ml.
Having enough water is more essential to the bread than you think - if there isn't enough water to make a slack dough, you don't have enough moisture to get that lovely network of gluten strands, which means a dense bread. No good. To an extent, it's even better to have it slightly too wet and slowly sprinkle over some flour, than to have too dry a dough and try to work moisture into the dough later.
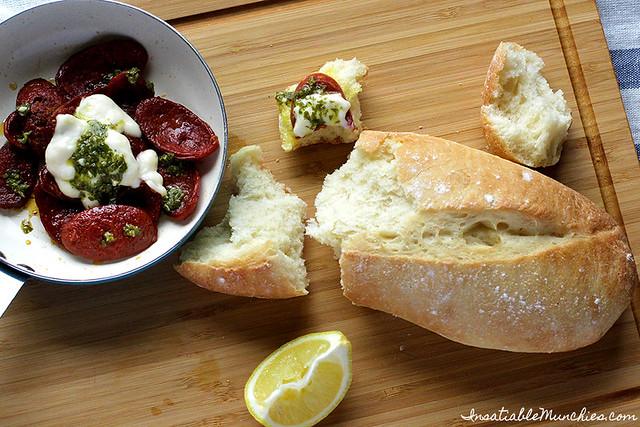
At this point, I got the bread to the stage of a crusty french style loaf - slightly chewier with more of a bite, but still with a soft interior that is very pleasant to eat. It also had a slightly thicker crust, more like a baguette than a loaf.
So how do you add softness? Oil!
Oil prevents some of the gluten formation, leaving more delicate strands and a softer loaf. However, oil also inhibits yeast activity, lengthening your proving time.
So with that in mind, I tweaked my recipe some more, and finally arrived at the bread recipe that I have today!
White Bread (Food Processor Method):
Makes 5 small dinner rolls or one large loaf
2 cups of strong flour (plus optional 2 tbsp strong flour)
1.5 tsp instant dried yeast
3 tbsp oil
1 tsp salt
1.5 tbsp honey
200ml (ish) warm water
Clean spray bottle with drinking water
I started with 2 cups of strong flour in my food processor. Over that I spinkled the 1.5 teaspoons of dried yeast, 3 tablespoons of oil, 1.5 tablespoons of honey (adding the oil before the honey allows you to use the same spoon easily) and finally the teaspoon of salt.
I readied about a cup of warm water from the tap- I gauged it by imagining a warm bath. If you're happy being in that temperature of water, so will your yeast! - and started the food processor. Now you won't need the whole cup, but it's good to have more water ready before you begin.
With the food processor running, stream in the water into the chute. You want the flour mixture to not only ball up, but to also stick to the food processor slightly. Not quite a paste, but you want it a touch past tacky.
Once the dough is wet enough, add in a tablespoon of flour back into the mix, just so that the dough just starts coming away from the sides of the processor. You don't want it to be completely dry - you want it such that the dough will still stick to the blades, but some away from the processor bowl.
Then, lightly flour the bench with the last table spoon of flour, and turn out the dough onto the flour. With floured hands - or oiled hands - lightly knead the supple dough for about a minute. Yes. A minute!
Then place into a lightly oiled container or bowl, and cover with either oiled cling wrap or a damp tea towel. Place into a COLD oven, and place a little saucepan of hot water underneath to help it along. Close the oven door and let the dough prove till it has doubled in size. (about 30-40 minutes, depending on the weather)
When the dough is ready, place a piece of baking paper on a cookie sheet and shape your dough to whatever you'd like. or you can roll the whole thing into a long roll and it will fluff back up into a rustic loaf. (About 40 minutes)
Now partially fill a sink with hot water and place the tray over the top of the sink - not in the water, but above it - and cover the loaf with a damp clean tea towel.
Preheat the oven to 210C, and wait till the dough doubles in size again. The heat from the oven should help your dough prove a little quicker. If the dough hasn't proved enough in this second proving, then the bread will end up dense.
Once the oven is preheated, check the dough. It should be done. Then lift the tea towel and dust the top of your bread with some flour. Now add slashes to your bread. These slashes act as two things - it creates some give in your loaf as the water content turns to steam and expands, and it also makes it look rustic and pretty! Lift the tray and ready your spray bottle. In one movement, place the tray into the middle rack of the oven and mist the bread loaf. The steam will create a nice crust on the outside.
Close the oven and lower the temperature to 200C. Bake till your bread is a light golden brown. A large loaf takes about 15 minutes or so, and a smaller roll can take as little as 6 minutes. Just don't walk away for too long! Then, open the oven briefly and fan some air in. The sudden ventilation will help the crust crackle.
Then close the oven and finish baking your loaf to a dark golden brown. Take it out and rest it on a heat protected surface for about 5 minutes before serving. Watch out for the steam!
Now I know it's a long recipe, but I promise you that it's worth it - freshly baked bread has now replaced commercial bread in my household. If you are a bit short on time, feel free to finish the first proving and shaping the night before. Then simply finish the second proving in the fridge - the dough will continue proving, but just slowly. Then take it out the next morning and let it get to room temperature while the oven is heating up. Et voila! Easy brunch!
What are your favourite bread recipes? Have you had any challenges so far?
Labels: Bakery, Brunch, Food for Thought, Ingredients, recipes
posted by Unknown @ 2:50 PM
2 Comments
![]()

2 Comments:
Can't beat the smell of homemade bread in the kitchen!
ive been making a lot of bread too, but using the water roux method. I like to addin the oils/butter last so i get fluffier bread.
Post a Comment
Subscribe to Post Comments [Atom]
<< Home