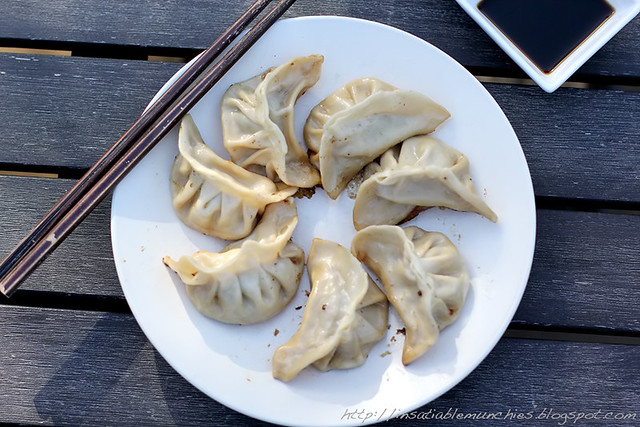
Pot Stickers (Pork and Cabbage Dumplings)
There are some recipes that you pick up, some recipes that you create...and some recipes that have been passed down through your family, from generation to generation. These recipes are often the most comforting, as they evoke warm happy memories, but also the hardest to recreate, as there are generally no hard and fast recipes, and each generation make little changes as they go.
These pork and cabbage dumplings evoke glowing, cozy memories of eating around the table with my family. My mother in the kitchen, cooking away, making hundreds of these tasty morsels, the heat of the kitchen a stark contrast to the cool, air-conditioned dining room. My first dumpling consisted of balls of dough with sticks of ginger stuck through the middle...which my mother patiently cooked and my family actually ate in support of my attempt at 'cooking'.
Today, I like to think that my attempts are a little more sophisticated than balls of dough, but I am still finding it hard to pin down the exact recipe. This has been passed on to me by my mum, who learnt it from my grandmother, who learnt it from her sister in law, who learnt it from her mother in law, who was from a village in China and learnt it from someone else. I'm pretty sure my version isn't quite 'authentic' or even 'accurate', but I've been told that it's pretty tasty, and it brings comfort to me, nonetheless.
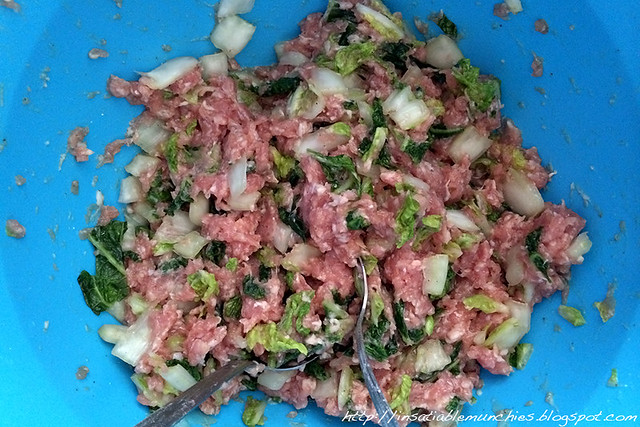
So first, we start with the filling.
Pot Stickers (makes about 50):
Filling:
500g Pork Mince
1/2 head of Chinese cabbage (wombok)
1/2 cup finely sliced spring onions
3 tbsp light soy sauce
1/3 cup Chinese rice wine
1 tbsp sesame seed oil
2 tbsp ground white pepper
Salt (lots of it)
First, dice the Chinese cabbage into 1cm pieces, a touch smaller if you want to make dainty dumplings. Place into the largest bowl you have. Liberally salt the cabbage, mixing it with your fingers, till you can feel that each piece has some salt on it. Leave for about 45 minutes, adjusting the time (longer or quicker) depending on the size of the cabbage dice (larger or smaller).
After the cabbage is pickled - you'll know by washing the salt off a piece and tasting it: it should be nicely salted and still retain some crunch - fill the bowl with water and use your hands to give it a bit of a rinse. Drain the cabbage through a colander and squeeze out the liquid. Repeat this process three or four times, till all the excess salt is washed off.
Squeeze out all the excess water out of the cabbage, and place back into a clean bowl. Add the rest of the ingredients and mix through. Leave to marinate for 30 minutes.
To wrap:
1kg circle flour (not egg!) wonton wrappers
Now you can make the wrappers yourself, but I really can't tell you the amounts of flour and water that you need (I do it by feel), and there's also a technique to rolling that you need to know (the edges should be thinner than the middle). So to make it easier, I'll just be showing you the wrapping technique.
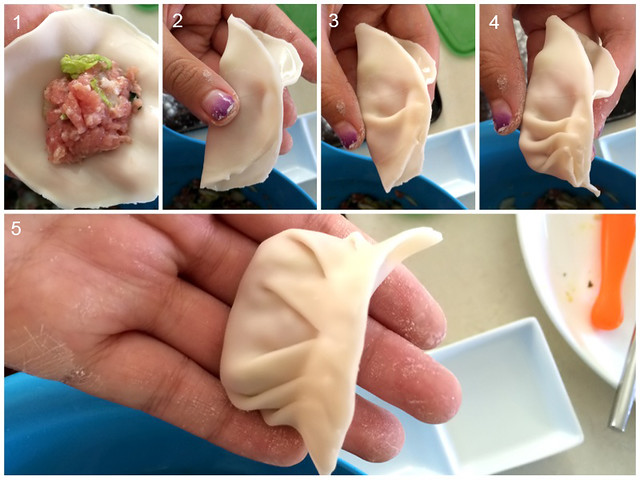
1. Place your filling (about a teaspoonful) into the centre of the wrapper, packing it down using your spoon. Make sure that there is enough rim in the pastry for the ends to pinch with two fingers.
2. Wet the rim of the wrapper with water, then pinch the wrapper shut in the middle
3. Wet rim of the layer of pastry to the right. To the right of the pinch, make a fold in the layer of pastry closest to you, and seal it over the centre pinch.
4. Repeat the pinching and folding actions twice more. Then repeat on the left. Pinch everything to ensure it's sealed shut (you don't want the dumpling opening on you during cooking).
5. Et voila! Your dumpling is made!
I like to lightly flour a tray and sit all the dumplings in rows. If you want to freeze them, do so in the trays before transferring them into zip top bags.
If you're not up for all the folding fussiness, you can also easily just press the edges shut with a little water.
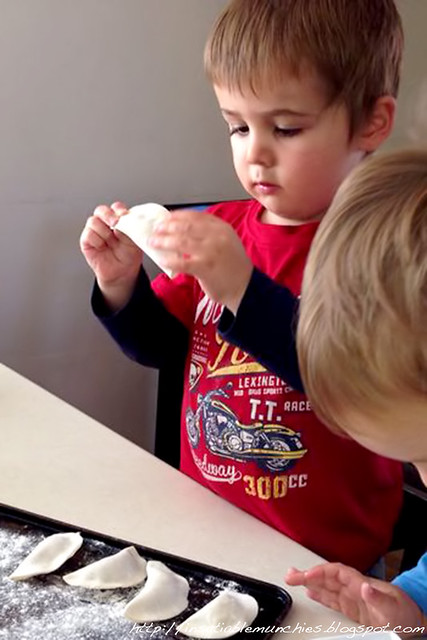
See? It's so easy that my three year old nephew can do it! Much better than I was at that age, anyway.
To cook them, just heat some oil in a deep non stick pan - try to make sure that the sides come up above the dumplings and that you have a lid that fits the pan.
Put a kettle of water on to boil. Fan out the dumplings, leaving some room between them to expand.
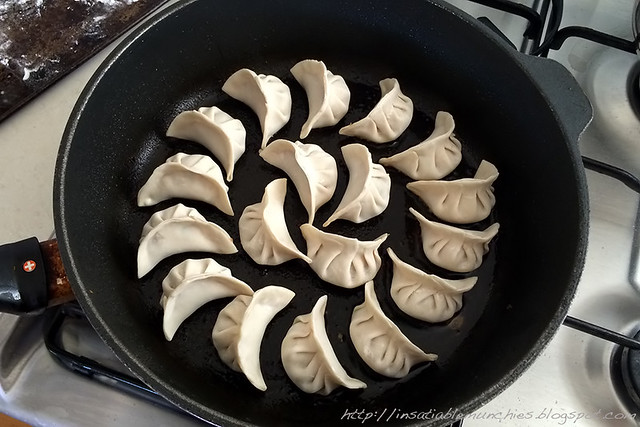
Fry them till the bottoms are very lightly golden brown. Then fill up the pan till the water goes about 1/2-3/4 way up the dumplings and put the lid on. Turn the heat down to low, and wait till the water evaporates. Once the water completely evaporates, you'll see the dumplings sizzle. If you try and move them too early, they'll stick to the pan and break - hence the name, pot stickers. To get a nice crispy bottom, you'll need to let the dumplings sizzle at the low heat, and you'll find that the dumplings will ease off with a slight push once they're done.
And there you go! Crispy bottomed pot stickers to enjoy. If boiled dumplings are more your thing, then you can place them into boiling water as well. They're done when they float. If you have frozen a few, they can go straight into the boiling water and are also done when they float.
So tell me, what are your favourite family recipes?
posted by Unknown @ 9:18 AM
10 Comments
![]()

10 Comments:
very nice dumpling wrapping skills!
Your dumplings are absolutely gorgeous! I can't wait to try, knowing full well mine will look like lumps... thank you so much for sharing these with us!
I love how uniform your dumplings look; usually by the time I get anywhere near the bottom of the bowl of filling, mine are looking increasingly chaotic! (I think I make too much filling.) Personally, I love the sort you make with a lot of Chinese chives but they can be hard to come by if you're not near an Asian market.
I luuurve potstickers and yours look fab! This was one of my Kummerspeck options ;-)
What fun to make potstickers. I was just about to make a batch for Chinese New Year and I'm glad you shared a recipe here. I will try yours tomorrow. Thanks for sharing this recipe for dumplings. It was fun doing Let's Lunch with you :-)
What's not to love about potstickers! The ultimate comfort food for me...
Aww your pot stickers are folded so neatly! And it's never too early to get the kids into the kitchen!
And to you, Betty! Let me know how your pot stickers go!
Thanks Amy!
Charming pictures ~ Love the tutorial!
Post a Comment
Subscribe to Post Comments [Atom]
<< Home