May 07, 2014

Mothers' Day (Foodie) Gift Roundup

My Mama and me! 

Mothers do so much for us: lovingly and selflessly, and most of the time, thanklessly. And while we all know that Mum shouldn't just be celebrated on one day of the year, we don't always appreciate Mum as much as she deserves it. So if you're wondering what to give the woman who has given you life and an appreciation of good food (and she already has too many mugs), here are some gift ideas that any foodie mum will appreciate.

Read more »

Labels: , ,

August 31, 2013

Father's Day Gift Roundup

dad and me

Dad can be so hard to gift sometimes, especially because your dad might just be the stoic type who tells everyone not to make a fuss. Well, Dad deserves some pampering too, and if you are stuck on ideas, here are some cute, thoughtful ones that I've come across, that I absolutely love.


Read more »

Labels: , , , , ,

August 26, 2013

Spiced Nuts

IMG_0440

With Father's Day just round the corner, I'm sure everyone's racking their brains to figure out just how to spoil dad. Well, if your dad loves flavoured nuts, I've got a really simple recipe here for you.


Read more »

Labels: , , , ,

May 24, 2013

Lemon Meringue...in a jar!

IMG_9853

I've been on a bit of a dessert binge lately - I keep telling myself that I burn more calories in the cold, and so am allowed to consume more. I know it doesn't quite work that way, but it helps me sleep at night. So when I saw these adorable individual lemon meringues in jars I just couldn't help myself.

Read more »

Labels: , , ,

May 17, 2013

Easy Lemon Tiramisu - no sabayon!

IMG_9842

I've still got some Anatoth lemon curd that was sent to me by Beyond the Square - thank you Carrie! I think fruit curds are a fabulous way to recapture that sensation of summer, and the tart lemon curd just brings a spot of brightness to my day.

Read more »

Labels: , , , , ,

May 08, 2013

Rose and Vanilla Tea

IMG_9755

More gift ideas for mum in the leadup to Mothers' Day! Thoroughly inspired by Dilmah's French Vanilla and Rose Tea - one of my mum's favourite because it's so fragrant - I decided to make my own Rose and Vanilla Tea!


Read more »

Labels: , , , , ,

May 06, 2013

Earl Grey Chocolate Truffles

IMG_9800

With roses, a popular gift is chocolates. So, moving in with the tea theme - my mum likes tea =) - I really liked this recipe that I was sent by Horizon Communication Group and thought that it would make a great gift idea! The ganache turned out really gooey, so I just rolled the chocolate truffles using tea spoons, then coated them with white chocolate.

Earl Grey Infused Truffle
Adapted from Dilmah's Real High Tea Recipe

2/3 cup heavy cream
2 tbsp unsalted butter
Earl Grey Tea from three tea bags
170g high quality chocolate

Heat the cream and butter over low heat and bring to the boil.

Stir in the tea leaves and allow to infuse of the heat for 5 minutes. Break chocolate into a heatsafe container - I used a mixture of dark chocolate and milk chocolate - and pour the tea infusion over the chocolate through a fine sieve, pressing against the tea leaves to squeeze out all the tea.

Stir till all the chocolate is completely melted, and place in the fridge to set.

Once set, roll out the ganache into balls. Place on a lined tray and pop tray into the freezer for a couple of minutes to firm up.

Meanwhile, melt white chocolate chips with some butter to loosen it to coating consistency. Take your cold chocolate balls out of the freezer and coat with melted white chocolate. Use two forks to drain off the excess before placing on a lined tray and pop back into the fridge to allow everything to set.

Sprinkle with sea salt to finish.

IMG_9804

The result is luscious, luxurious chocolate truffles that have all the aroma of earl grey tea, finished with the palate cleansing sea salt. And if sea salt is not your thing, feel free to finely grate some lemon zest over the top! Delicious either way, and great for a gift. 

What are your favourite chocolate combinations? 

Labels: , , , , , , ,

May 04, 2013

Roses and Pearls

IMG_9717

Mother's day is just around the corner, and it can be hard to find just the right gift. The most common thing to get is a bouquet of flowers - roses, carnations - but I really don't like the idea of flowers wilting in a vase on the dining table.

So why not an edible bouquet of flowers?

Read more »

Labels: , , , , , , , ,

March 05, 2013

Lindt, Martin Place

IMG_9513

One of the ingredients to a great girls night out is definitely oodles of chocolate, and the Lindt cafe has been a favourite meeting spot for many a girls night out for me. So imagine my excitement when I got an invite to the reopening of a completely revamped Lindt Cafe at Martin Place!
Read more »

Labels: , , , , ,

December 24, 2012

Have a very Furoshiki Christmas!

IMG_9162


I hope you have been enjoying their Christmas Eve. I just thought that with the whirl wind of activity that I've been going through I'd just drop a note to wish you a very Furoshiki Christmas.

Scarves have never looked so cute! =)

Labels: , , ,

November 20, 2012

Queen Make-At-Home Gelato Kits, Part 1

Layout 1

From left: Lemon and Chilli Sorbet, Chocolate Gelato with salted butterscotch sauce

I absolutely LOVE receiving things in the mail, and this time it's Queen Make-At-Home gelato kits!!

IMG_8756

Summer has rolled around in a BIG way, and that's just put me in the mood for ice cream - meaning that these kits have come at the perfect time. I received 3 gelato kits and 1 sorbet, and I wanted very much to do something special with them. I know that being someone who constantly craves variety and surprise, I simply could not just have your run of the mill gelato flavours. But what to make?

Well, the lemon was the easiest to figure out. Something that I absolutely love with my acid, is the burn of chilli. I just love how the citric acid in lemon makes my tastebuds ring like the bells of Notre Dame, and then the capsacin in the chilli just blaze right through, setting them all on fire. Of course, I didn't want my gelato to make people reach for a glass of water, but I did want it to bite back. And so…

Fire and Ice

Fire and Ice Sorbet

It was simple, really. Lemon sorbet churned with just a touch of good chilli jam. Is there anything more simple? The sorbet turned out refreshing, and yet tantalising at the same time! We had it topped off on lemon-juice-and-maple-syrup-soaked crepes. Because the chilli jam wasn't knock-your-socks-off spicy, it provided a slight warmth in my throat following the first tang of refreshing lemon. A match made in heaven.

The chocolate gelato was just slightly harder to pair. I wanted something that wasn't too traditional, but it was a little harder to match unconventional ingredients to a chocolate gelato - in my opinion - as the rich, luxurious texture and deep flavour of the chocolate will just dominate. Yes, it can definitely be argued that there are many different things that can be done with chocolate, but I think that chocolate gelato is a very different beast. You're not just dealing with the texture, flavour and mouth feel of pure chocolate, but also of the frozen creaminess of the gelato. (And I already used the chilli idea for the lemon.)

But thinking about the creamy texture and luxurious flavour made me think, "Why not just push luxuriousness and decadence to the next level? Surely more of a good thing can't be bad?"

The answer? Salted butterscotch sauce.

Butterscotch Cocoa


Butterscotch is a relatively simple thing to make. Supposedly you're meant to use actual scotch in it, but I don't happen to have it around the home. The recipe seems to work well enough, and can be used to top off any number of desserts.

Salted Butterscotch Sauce

125g Butter
1/2 cup Brown Sugar
1/4 cup cream
Coarse Salt/Sea Salt Flakes

In a shallow pan, melt the butter and whisk in the brown sugar. Once the mixture has come to a boil, add the cream in slowly and whisk to combine. Continue to cook the sauce over low heat until the sauce thickens slightly. Sauce will continue to thicken upon standing. Once cooled, fold in sea salt flakes, careful not to let them fully dissolve into the sauce. Alternatively, sprinkle the salt on just before serving.

I would strongly recommend a small serving of the ice cream and sauce. I'm a person who loves any amount of decadence and hedonism, but even I felt that this was a truly rich combination. Immensely satisfying in small amounts. And given that it's so easy to make, you can have frozen desserts to last you through those 40C days to come!

What I really like about these kits are that they are so simple, and allow you to concentrate on adding your spin on it without having to worry about things like infusing a particular flavour into the ice cream custard. These flavours are just so basic that you can add any multitude of things to it, and just create your own!

Of course, with great creativity still comes things to look out for, and these are my top things to look out for when making these gelatos:
  • Make sure that you add the liquid component slowly and in parts, whisking to combine before adding the rest. If you add all of the liquid at once, it can be hard to ensure that all the powder dissolves into the liquid to make a homogenous mixture, resulting in a wonky textured ice cream. 
  • Anything that you wish to churn into the ice cream should be somewhat fluid but still of a syrupy consistency. When I added the chilli jam to the first batch of ice cream, I added it straight out of the jar and all the jam just sunk to the bottom. Heating it gently and then allowing it to cool to room temperature helped to ensure that it would mix into the lemon sorbet entirely.
  • If you want to swirl the butterscotch sauce into the gelato, you can, but make sure that the gelato has churned to a thick enough consistency, or the sauce will settle eventually into the bottom of the container.
  • In the pre-cooling process before churning, DO NOT put the gelato straight into the insulated bowl of the churner and put that in the fridge. You will end up with rapidly frozen edges that will cause the paddle of the machine to not turn and following that, very disturbing noises from your ice cream machine.
  • That being said, the pre-cooling process of putting the mixture in the freezer for 20 minutes really helps you get the thick ice cream consistency when you put it into the machine to churn. Otherwise, at the end of 40 minutes of churning you get a semi-frozen tasty soup and is wayyy too thin to swirl flavours through.

But the best part is that these mixtures are so forgiving. You don't have to worry about overcooking or curdling a custard. Even when I wasn't able to make a completely homogenised gelato/sorbet mix - I was too eager and put all the liquid component in at once - the gelato still froze to a creamy consistency and was delicious nonetheless.

What are your favourite delicious gelato combinations?

Note: Tammi Kwok of Insatiable Munchies was given Queen Make At Home gelato kits by the nice people at Queen Fine Foods and Beyond the Square Communications.

Labels: , , , ,

October 21, 2012

Furoshiki Picnic

IMG_8681

I like to think that I am a fairly moderate person. So I don't know why my little and seemingly harmless projects always seem to balloon into large undertakings where I feel like I've bitten off slightly more than I can chew. Of course, as a foodie thats not always such a bad thing, but you get the drift.

Recently I've been into the Japanese art of FuroshikiFuroshiki is basically the art of taking a square piece of cloth —I've made a couple of Furoshiki cloths of my own — and making a few knots, such that it can become a variety of bags, complete with handles!! The above picture shows just two of the ties, and you can pretty much get as creative with it as you want to. You can wrap gifts in scarves, knot it into a grocery bag, make it into a lunch bag...

So I thought, "if you can wrap your lunch in it, why not bring more food? I know, we'll have a picnic!!"

And so we did. I had a nice juicy watermelon in the fridge, so I decided to try a recipe for watermelon salsa.

IMG_8626

I kept some watermelon aside just for eating (Tetris anyone?) and put the rest in a bowl with some salt, finely diced red chilli and Spanish onion, balsamic vinegar, and parsley. 

IMG_8632

The flavours were left in the fridge to meld for about an hour, and then packed, ready to go for our picnic!!

IMG_8639

In the end, I had a larger Furoshiki bag and a little one, and this was what we managed to fit in them.

IMG_8654 copy

Between the two of us, we had five mortadella and pickle sandwiches, orange wedges, kiwi halves, Camembert, tomato and cucumber salad, a container each of the watermelon and the watermelon salsa, shaved ham, and a bottle of homemade lemonade.

Needless to say, we couldn't finish all the food, but it was worth the whole day of preparing food for an afternoon in the park.

Gotta love the little projects. :)

Labels: , ,

July 21, 2012

Twice -cooked Lamb Ribs with Basil Chimmichurri

Lamb Ribs and Basil Chimmichurri

So. This is one of those stories that just grow and grow, until you get to the end and think to yourself, "How did I get here?"

A friend of mine very kindly gave me big bunches of basil from his garden (as you can probably guess, this post is just slightly overdue). Rather than just do the usual and make pesto, I thought that I'd try something different, and make a Basil Chimmichurri (recipe to follow).

Lamb Ribs and Basil Chimmichurri

Basil Chimmichurri

3 bunches Basil
1 bunch Parsley
Olive Oil
Salt and Pepper
Sushi Vinegar
Kochukaru (Korean Chilli Flakes)

Place basil and parsley in a food processor and add enough olive oil to help make it into a slightly runny paste. Then add salt and pepper, vinegar, and kochukaru to taste. It's meant to be ever so slightly on the tart and salty side, and just remember that the chilli flavour will just get more intense as it sits.

--------

And you know the problem with having condiments sitting in your fridge? You start wondering what you can have it with. Well, that's my problem, anyway. No condiment gets left unexplored!

Then I thought, "Maybe a meat dish. What can I make that will go well with the chimmichurri. I know, lamb! I like lamb ribs...I shall go buy ribs".

And so began the process of wanting to make tender, tasty ribs, and I ended up with...

Twice-cooked lamb ribs
Adapted from Blue Kitchen

1-1.5 kg lamb ribs
1 Head of Garlic
3 small Onions, halved
3 Bay leaves
Sliced garlic for roasting (optional)
Caraway Seeds
Chopped Rosemary
Salt
Pepper

Place the ribs, garlic, onion and bay leaf in a pot and cover with water. Bring to the boil and simmer for an hour. Skim off any scum.

Lamb Ribs and Basil Chimmichurri

Remove ribs and lay flat on a baking tray. You can make ahead to this step and leave in the fridge for up to 3 days if you'd like. I kept the cooking liquid as stock, and made risotto with it. And what about the fat off the top? Potatoes my friend, potatoes.

Lightly spray the ribs with oil. There will be more oil to follow from the ribs themselves, so this is just a step to help the herbs and spices stick better.

Preheat the oven to 180C (fan forced)

Sprinkle the caraway seeds, rosemary, sliced garlic, salt and pepper over the top to taste, then put the ribs in the oven for about 20 minutes or till golden brown.

Lamb Ribs and Basil Chimmichurri

Rest for 5 minutes, and then serve with the chimmichurri.

Lamb Ribs and Basil Chimmichurri


And that's my story about how someone giving me basil became a few meals of rich lamb ribs. I like to see it as a series of delicious events/ ;)


Labels: , , ,

February 25, 2012

I want...

OMGGGG!!!! How cute are these novelty shot glasses from oo.com.au?? I kind of want some to serve my clear bloody mary in!

Labels: , ,

February 16, 2012

Pepe Saya, Tempe

Untitled

Most people who know me know that I have a thing for butter, or any diary product. Which is why I was especially excited when - after the Master the Mousse Class with Homemade Fine Foods - Pepe from Pepe Saya offered to show me and the French Wench the making of truffle butter!!!

First, you start with really nice butter...

P2117895


P2117893

This is a cultured butter, and besides the usual richness that you get from this epitome of rich dairy goodness, there is a slight sourness that I feel adds a lot of character and attitude. It's like the luxurious meets funk. I like.

Pepe was telling us that he first matures the cream, then adds the culture, before churning the butter. And here I thought that all you had to do was over-whip cream!

Side tangent - besides butter, Pepe Saya also has a range of other foodstuffs, my favourite of which is the Taramasalata!

IMG_0564


P2117906

I can't say definitively that it's amazing Taramasalata because I didn't grow up with it, but I can say that it's definitely something I really like! The acid/garlic/saltiness is just so addictive to me that I finished half the jar pretty much upon arriving home. LOVE IT!.

Anyway, back to the truffle butter.

Pepe got sent truffles from Perigord Truffles of Tasmania.

IMG_0511

And man this is the biggest pile of truffles that I've ever seen in person.

IMG_0518

The smell was just absolutely intoxicating.

Pepe simply shaves off the truffles into the butter and then mixes it. Apparently truffles have an 'expiry date' of 10 days, and so you really have to work quickly. Butter does help preserve the flavour though - the oil prevents air from coming into contact with it, and so prevents oxidation.

And truffles are not just amazingly delicious, they are also really pretty on the inside!

IMG_0525


Isn't that marbling simply gorgeous?! It gets me excited like a good piece of steak. Okay, that came out wrong, but you know what I mean.

Oh here's another sight to behold!

IMG_0541

TEN KILOS OF BUTTER SPECKLED WITH TRUFFLE!!!!!

*wipes drool*

Maybe it's just me, but the combination of the two is just so simple yet so mind blowing!!!

And we actually got to take little pats home!!!!!!!!

IMG_0549


!!!!!!!!!!!!

Just in case there are any doubters out there, it is DELICIOUS. Although the suggestion was to let it melt slowly onto a good steak, I had mine spread onto sourdough toast, and it was one of the most satisfying lunches I've ever had. Light and yet luxurious at the same time, I just kept breathing in the intoxicating scent of the truffles mingling seductively with the cultured butter.

Even if truffle butter isn't quite your thing and isn't enough to get you as excited as I am, Pepe also has butter master classes ($80) and cheese making classes ($220/class, 3 parts) as well! Just contact them for more information. With my history of loving cultured diary products, I know what I'm asking for as my birthday present!

Pepe Saya
Unit 4, 3 Wood Street
Tempe NSW 2044
+61 2 9519 2793
info@pepesaya.com.au


View Larger Map

Labels: , , ,

February 13, 2012

Homemade Fine Foods, Tempe

P2117885

Apparently it all started with Lemon Curd. Homemade Fine Foods was founded on a 'real food' philosophy - food that you can buy, that will taste like what you've made at home. The upside? Not having to spend hours making it yourself. And while I love cooking, that idea sounds fantastic to me - especially after a long day on my feet where I don't even really feel like cooking dinner, much less dessert.

And they don't only do desserts, they teach you how to make it too!

I was invited over the weekend by a very lovely Merna from Homemade Fine Foods to a Mousse Class!! This was an especially exciting piece of news for me since my only (failed) attempt at a chocolate mousse ended up with whipped cream in a glass and bits of chocolate that had hardened because of the coldness of the cream. Go figure. Lovely, aerated, velvety dessert just seems to elude me. After having to admit recently - with much embarrassment - that I had no idea how to create a proper mousse, I was thankful for the opportunity to be taught the proper techniques.

The class was at 11am, and because Sean was working the night shift, we had not had anything to eat and were starving. No worry though, they feed you!

Untitled

Untitled

I love events that feed you.

Great cheeses from Small Cow Farm and luscious, ripe fruit really started the day off well for me. Even Sean - who had worked all night - was happily relaxed and ready for some chocolate.

Untitled

And boy was there chocolate.

We were taught the difference between using compound chocolate and coverture - compound can be heated to a higher temperature and so will pasteurize your eggs - and what temperatures to look for when melting your chocolate.

P2117925


Interesting fact - while cocoa butter has a melting point of 35C, compound chocolate contains fats that allow you to heat it higher, hence allowing the pasteurization of the raw eggs!


The class also covered whipping and incorporating the meringue...

P2117934

P2117936

And the whipped cream, amongst other things.

P2117923

Now, Sean isn't the biggest cook around - in fact, he hardly ever gets to step into the kitchen because I'm always in there doing something or the other - but there's at least one part of the class that he absolutely LOVES.

Untitled

How can anyone say no to that finished product! Sweet, creamy, and comforting, we got to take home two massive tubs of mousse that had been decorated with swirls of dark chocolate. The mind-boggling thing was that such a simple technique looks so pretty and polished. Definitely something that I'll try on my next dessert served in glass.

There were some moments that we had to wait - for example, the chocolate mixture had to cool down before mixing in the whipped cream - and guess what happened?

They feed you some more!

Untitled

Untitled

Did I mention that I love being fed?

Untitled

And while I have a weakness for Bread and Butter pudding - it's a comfort food that many members of my family have in common - and Sean devoured the Sticky Date Pudding, the Raspberry Panna Cotta was my favourite!

This story is too cute - you've gotta see it for yourself:


SO CUTE!

Apparently Cuttaway Creek Raspberry Farm also supplied raspberries to many well-known Sydney restaurants. I have to pay a visit to them some day.

But anyway, back to the class. I left with arms full of tubs of mousse and a belly full of delicious desserts. Both Sean and I thoroughly enjoyed ourselves, and that was a feat for Sean after pulling an all-nighter.

It was a great way for us to cook together as a couple, and a great pre- (or post) Valentine's day present!

The class costs $80 per person and is held at their factory store in Tempe.


Homemade Fine Foods
Unit 4, 3 Wood Street, TEMPE NSW 2044
(02) 9559 4449
info@homemadefinefoods.com.au


View Larger Map


Note: Insatiable Munchies was invited as a guest of Homemade Fine Foods


Labels: , , ,

January 28, 2012

Profit-eroles

P1267711

Huat ah!

Since it's Chinese New Year, I thought that I'd make the very auspicious-sounding Profit-eroles. Geddit?

Ok, bad joke.

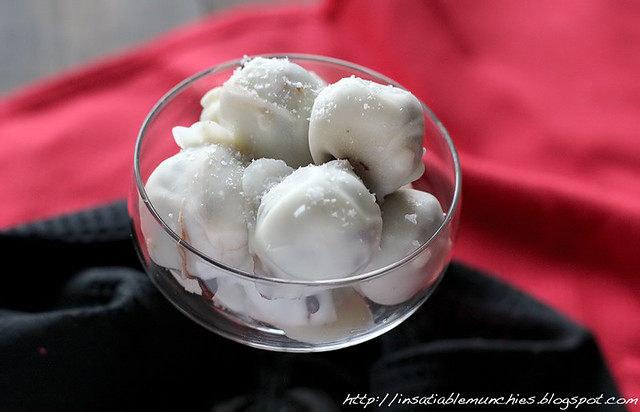
But anyway, these delicious little morsels are always great as party food, and allows you to have dessert done and dusted in advanced.

First, the Choux pastry. This is basically the same pastry as eclairs, so you can take the recipe and just change the shape if you're so inclined.

Choux Pastry

I got this off Taste.com.au and it works every time!

80g butter
1 cup water
1 cup flour
3 eggs

Bring the water and butter to a boil.

Take the mixture off the heat and stir in the flour. Vigorously I've heard somewhere (don't quote me, though) that the secret to puffed, gorgeous profiteroles is making sure that the gluten is well-worked.

SO WORK IT! *insert relevant hip-hop song here*

Once the flour is incorporated, work in the eggs, one at a time, making sure that each one is mixed in before you add the next.

P1267705

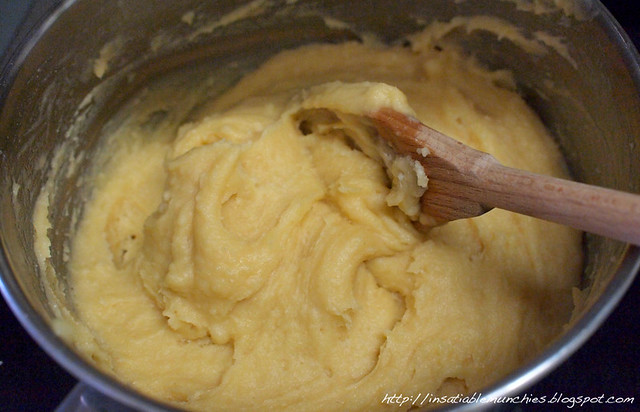
You'll end up with a slightly spongy wet-ish batter.

Put aside to cool.

Meanwhile, preheat the oven to 180C (fan forced). I've found that you can probably afford to turn the heat down slightly from that - the pastry needs to 'dry out' slightly inside, and baking it for slightly longer at a slightly lower temperature helps that process along.

Using two teaspoons, spoon heaped amounts of the pastry mixture onto a lined baking tray.

P1267708

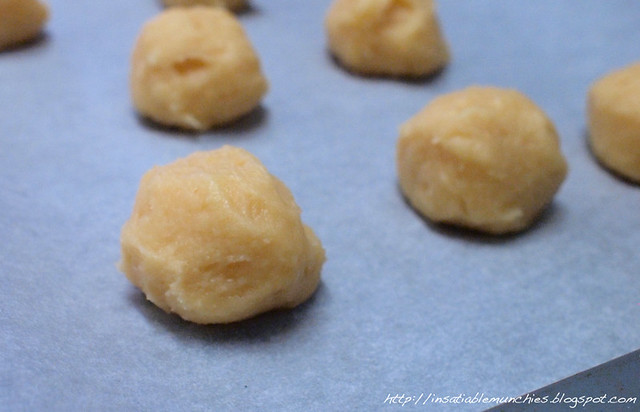
Using wet fingers, pat down any peaks that can end up burning in the oven.

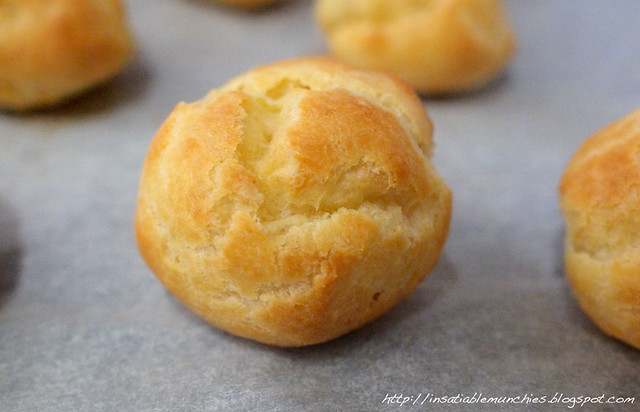
Bake till puffed and golden brown.

P1267712

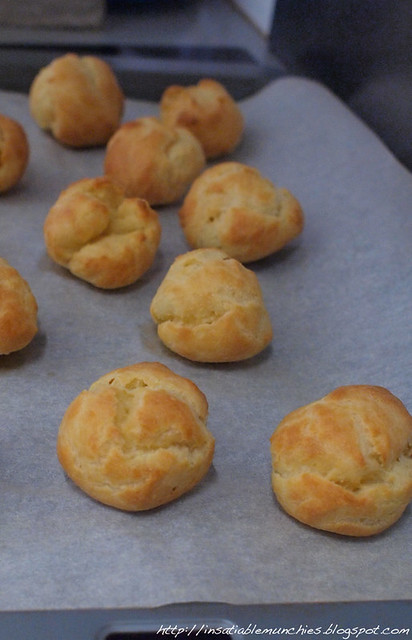
Armed with a sharp knife and a pair of tongs, carefully pierce the bottom of the profiteroles and place back on the tray, pierced side up, and put back into the oven with the door ajar. MAKE SURE THAT THE OVEN IS TURNED OFF! You don't want burned pastry. This will help it finish drying out.

Then, move on to the custard.

Custard

3 egg yolks
1/3 cup sugar
1/3 cup flour
1 3/4 cup milk
Vanilla bean or vanilla extract

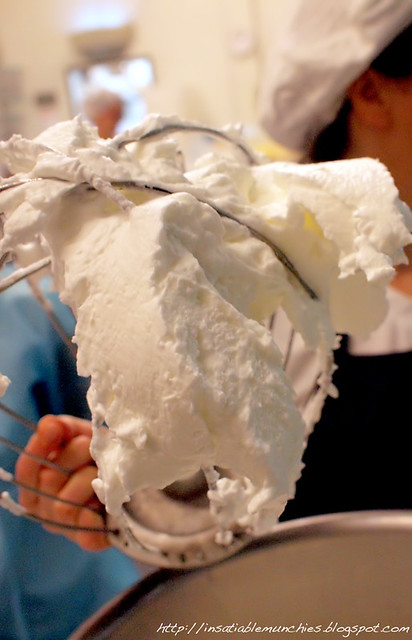
In a medium saucepan, whisk the egg yolks with sugar.

P1267718

The mixture will turn a very pale yellow, and although the original recipe says to use caster sugar, I wouldn't worry too much about it - it ends up being dissolved anyway. Also, I used a mixing bowl to start off with, but really, you could do this in a saucepan. Less washing up is always good.

Whisk in the flour, and when that's incorporated, add the milk and vanilla and place the saucepan on VERY LOW HEAT. Trust me.

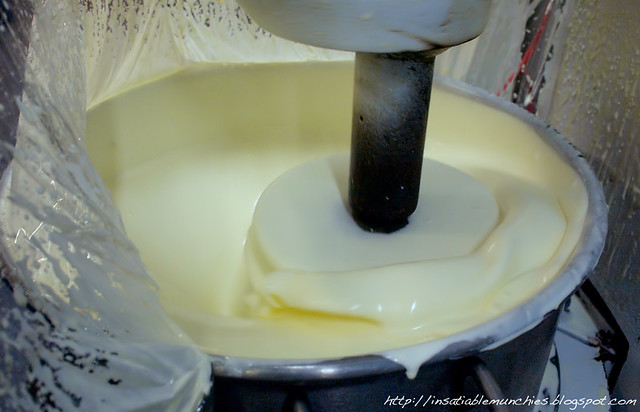
Keep whisking. This is not a good time to walk away, be distracted by the TV, or do the dishes. WATCH THAT SAUCEPAN LIKE A HAWK.

And keep stirring!!!

Very soon, you'll see the mixture begin to thicken.

P1267720

At this point, burning will follow quickly. I think what happens here is a little bit like the Tangzhong method in baking. For the science behind it, click here. Basically the starch (flour) will thicken in the process of water and heat and will so contribute to the texture of the custard.

Still, I'm not too crazy about this particular recipe as I find the custard a touch too runny, but feel free to use any piping custard recipe you'd like.

The profiteroles can last about a week when stored in an airtight container, in the fridge.

Labels: , ,